One of my most well-known pieces is a vintage style, military pinup called Sgt. Davidson. I get asked quite a bit about my workflow, so here is a short tutorial that helps to describe the process.
Step 1 – Poser Pro
All of my pin-up work starts by using 3D modeling software called Poser Pro 2014. Poser allows you to take 3D models, pose them, add textures, clothing, accessories, scenery, etc, adjust the lighting and then render it all down to a final image. I then take that image and do post work in Photoshop.
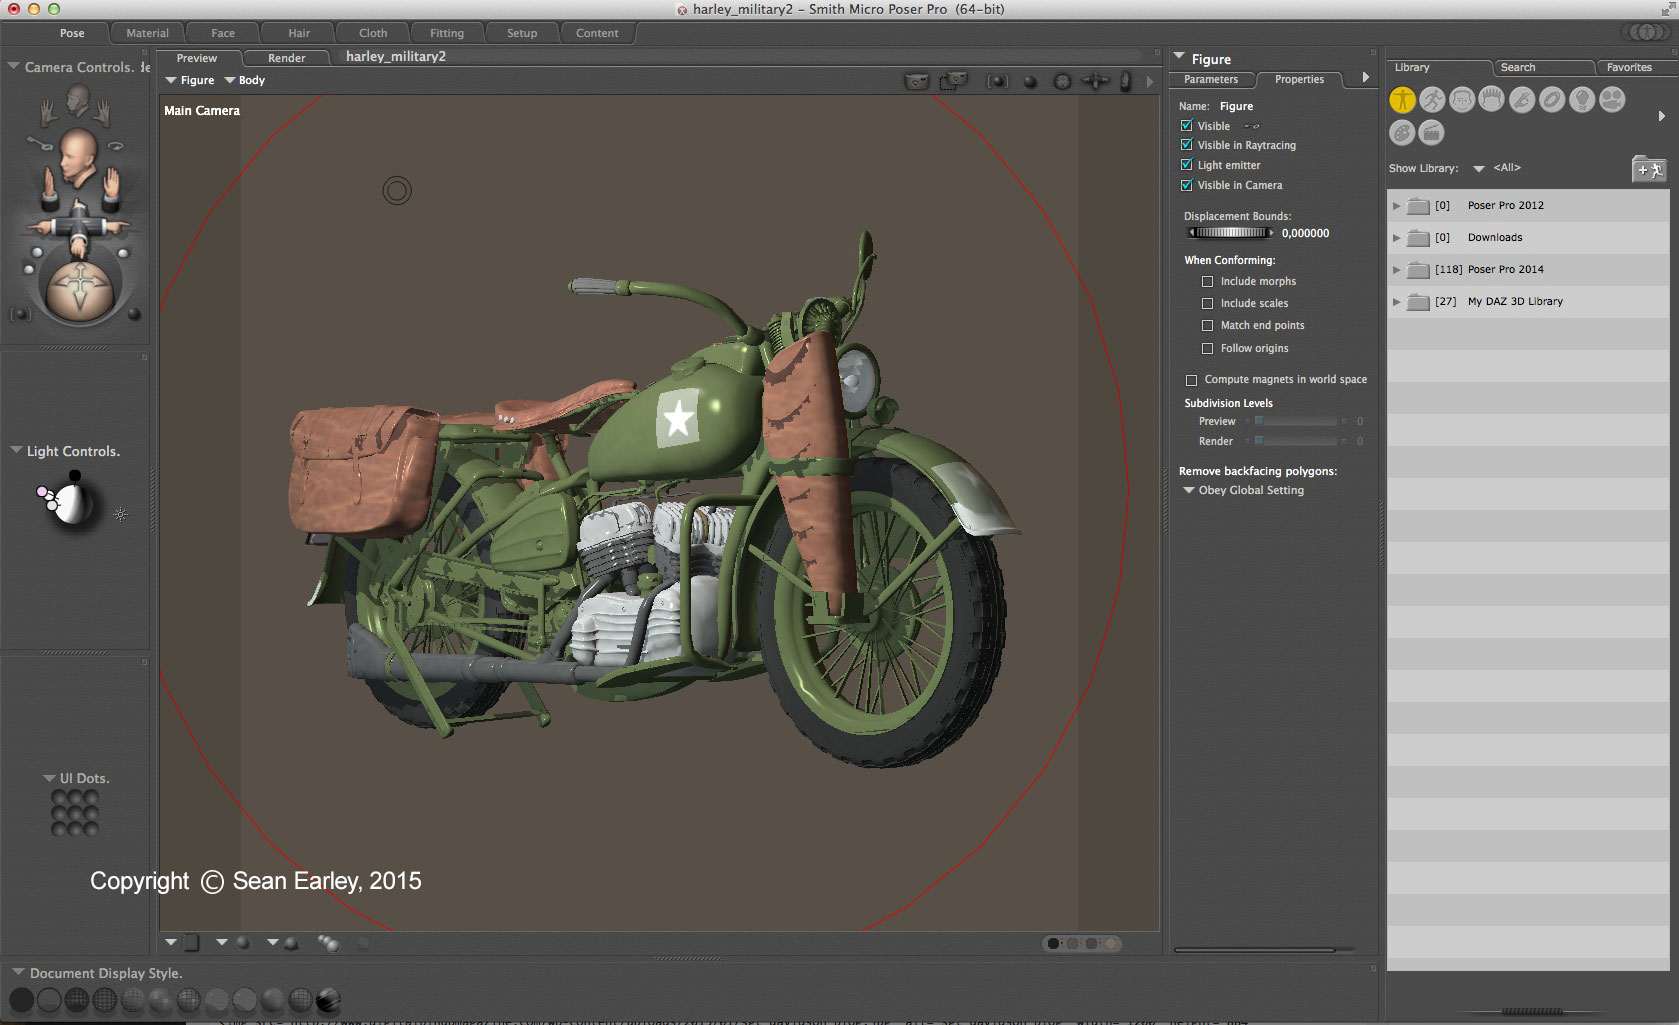
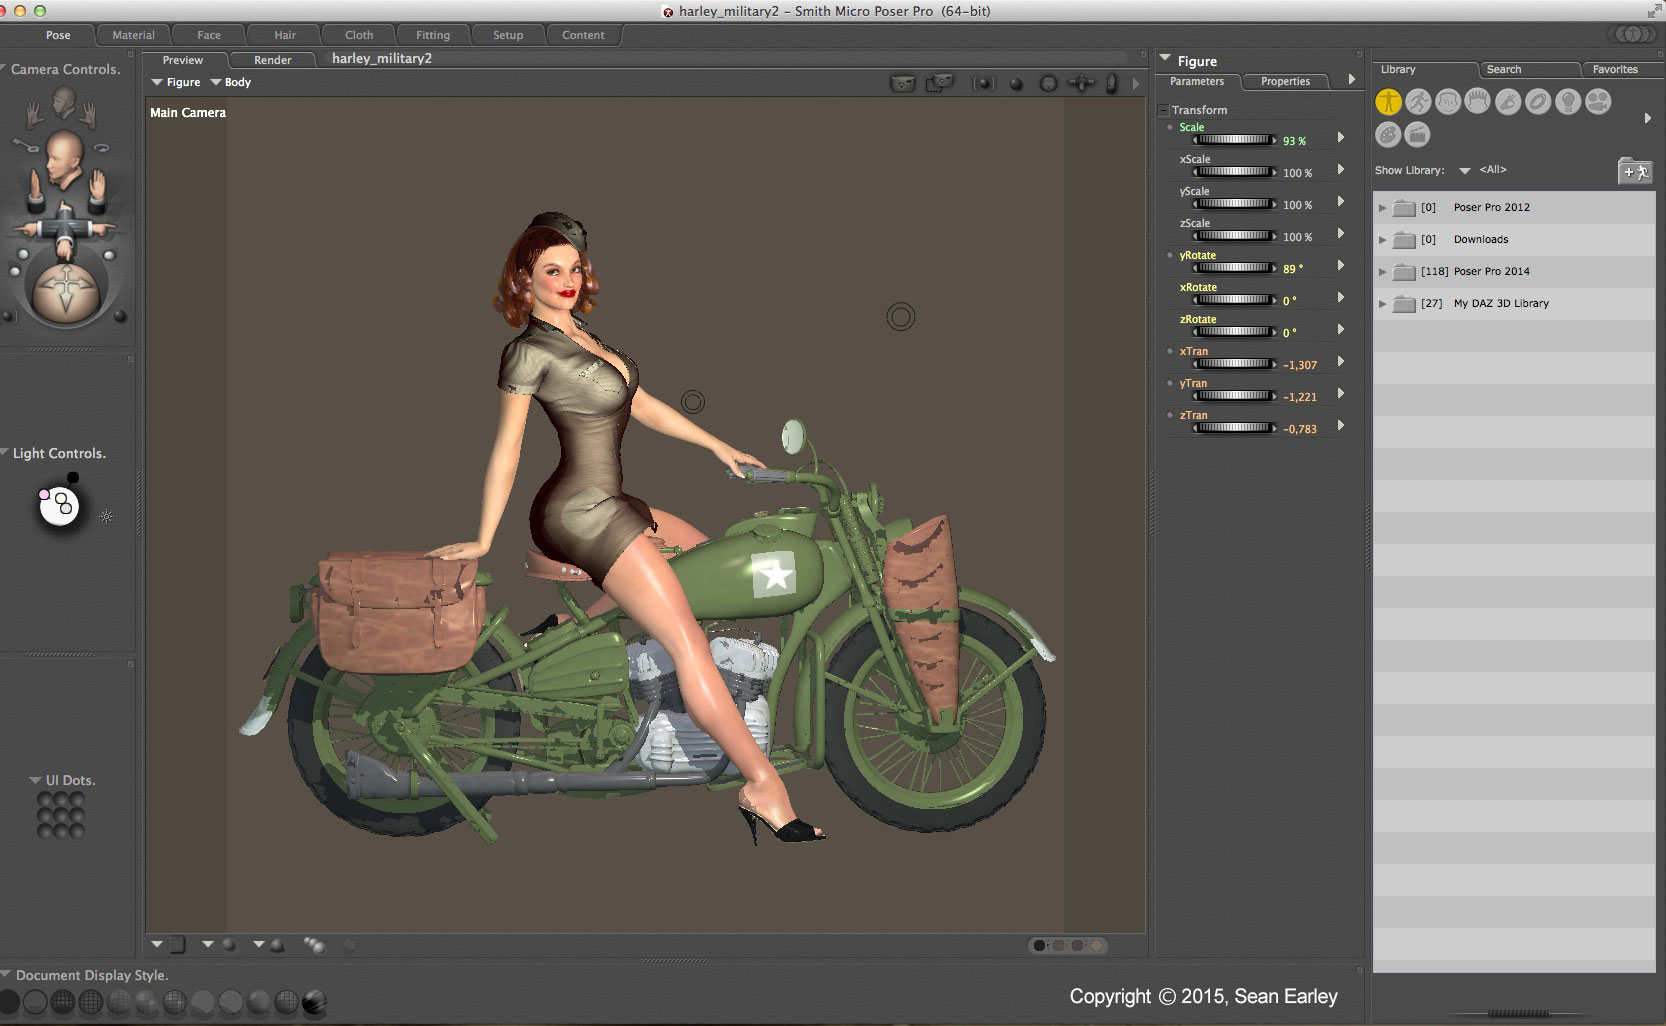
I started the process by using an existing 3D model of the motorcycle. I then added one of my favorite models which I made by combining morphs and textures from a few different characters, some retro hair, heels and a set of vintage style military clothing that complimented the look.
The real challenge with this piece was to find lighting that equally accentuated both the skin tone on model as well as the flat texture on the motorcycle. Somehow I got lucky and I only needed a couple test renders to find something I was happy with. I often will have to do multiple renders of either the model or the accessories by themselves, then comp them together later in Photoshop.
Once I found the right pose and lighting, I rendered the final image and exported it as a transparent png. I think the render took about 2 hours, which was awesome because sometimes it can take all night!
Step 2 – Open the Render in Photoshop
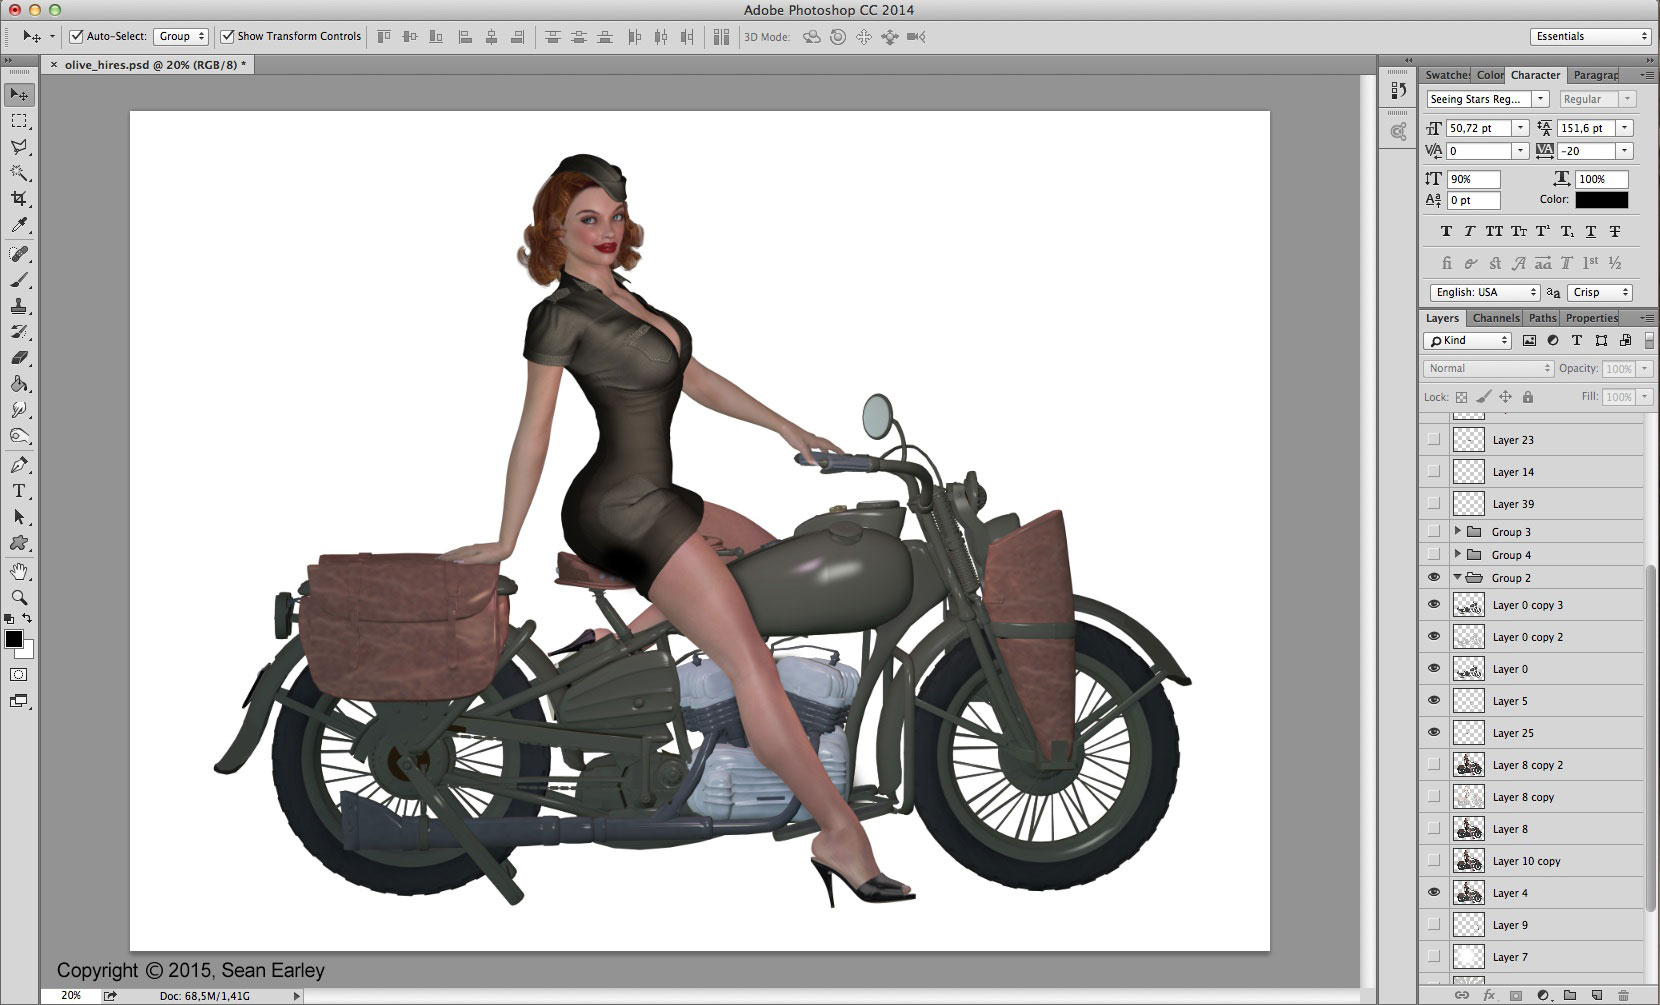
Finally in Photoshop! Now that the render is complete, I imported it into Photoshop, which is where all the magic begins. I resized the canvas, added a white background and then began the cleanup process.
I started by duplicating the layer and then removing the model so that I had a clean layer with just the bike. Once this was done, I duplicated the bike layer a few more times and played with the levels and transparency settings in order to bring out certain highlights. Normally this is a trial and error process of playing with the screen, overlay layer settings, erasing some areas, then adjusting the transparency until I get what I want. Sometimes I will take all the adjusted layers, merge them, then duplicate again.
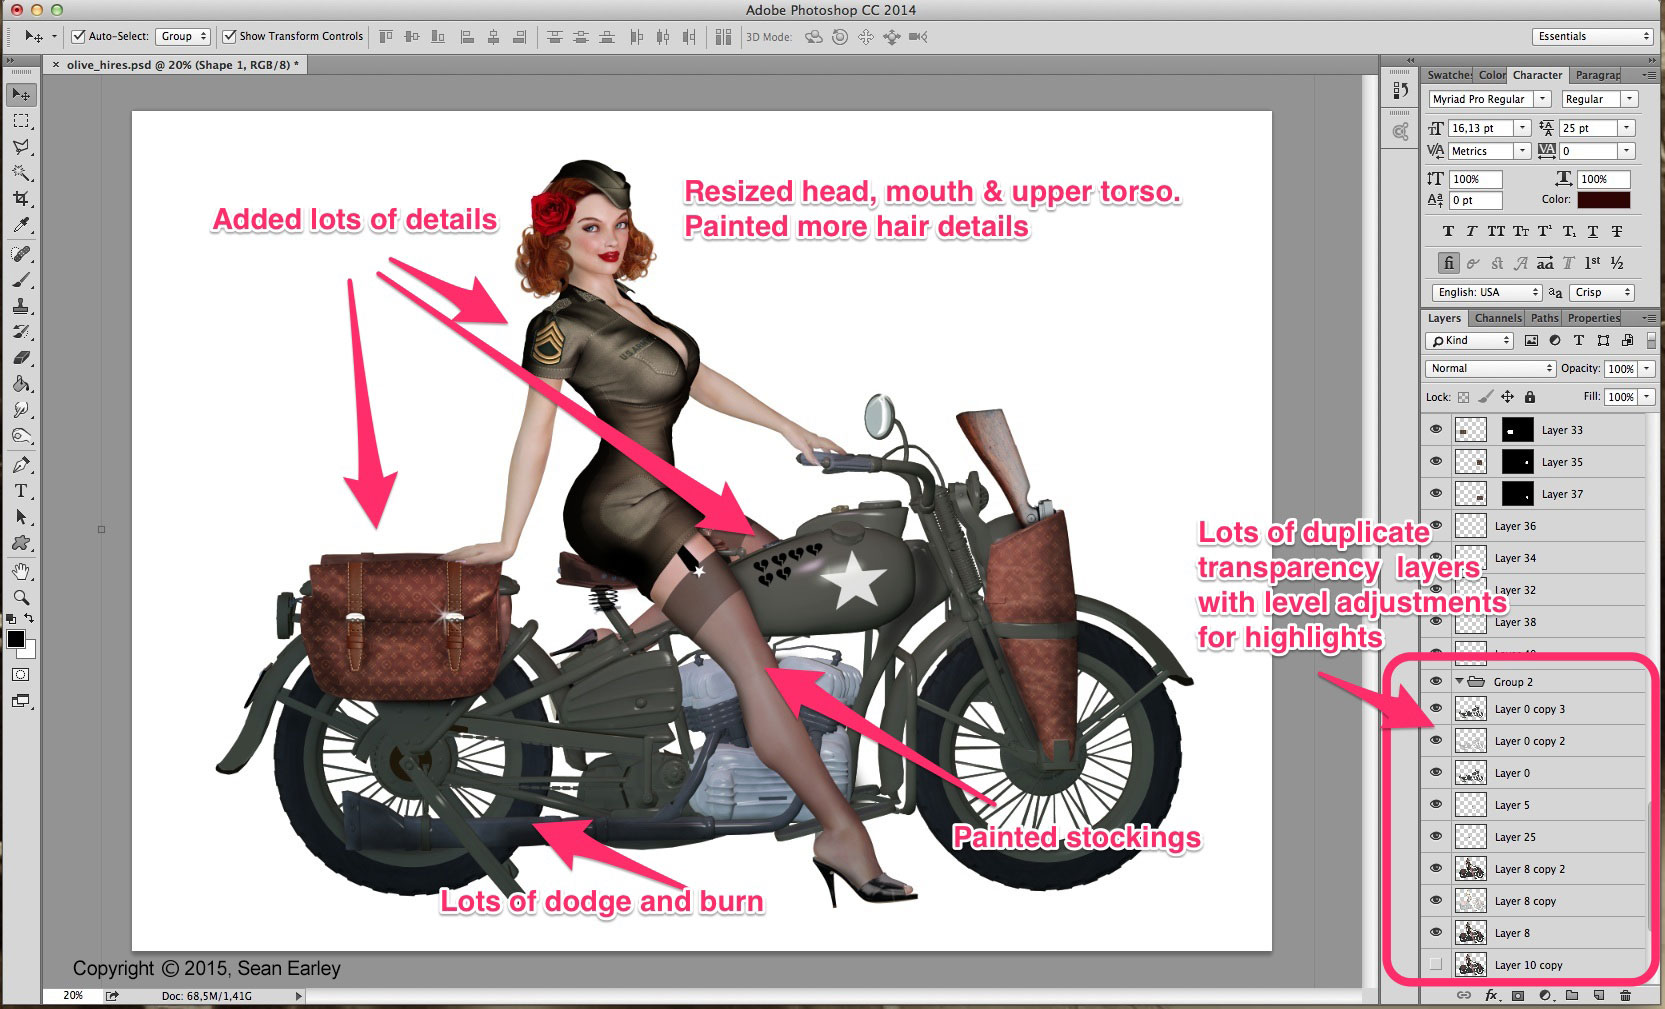
I then did the same with the model, using the dodge and burn tool to create shadows and accent certain features. I decided to resize the head, mouth and upper body, which I felt was a bit small.
Step 3 – Details & Highlights
Once I was happy with the basics, I started adding details, such as painting more hair, adding some real leather texture to the bags and holster, adding the army patches, the flower, the gun, the broken hearts on the gas tank, etc. I painted the nylons, which was done by selecting the leg, coloring the selection black and adjusting the layer transparency. I then made a few extra layers and tweaked the transparency some more. More dodge and burn for highlights.
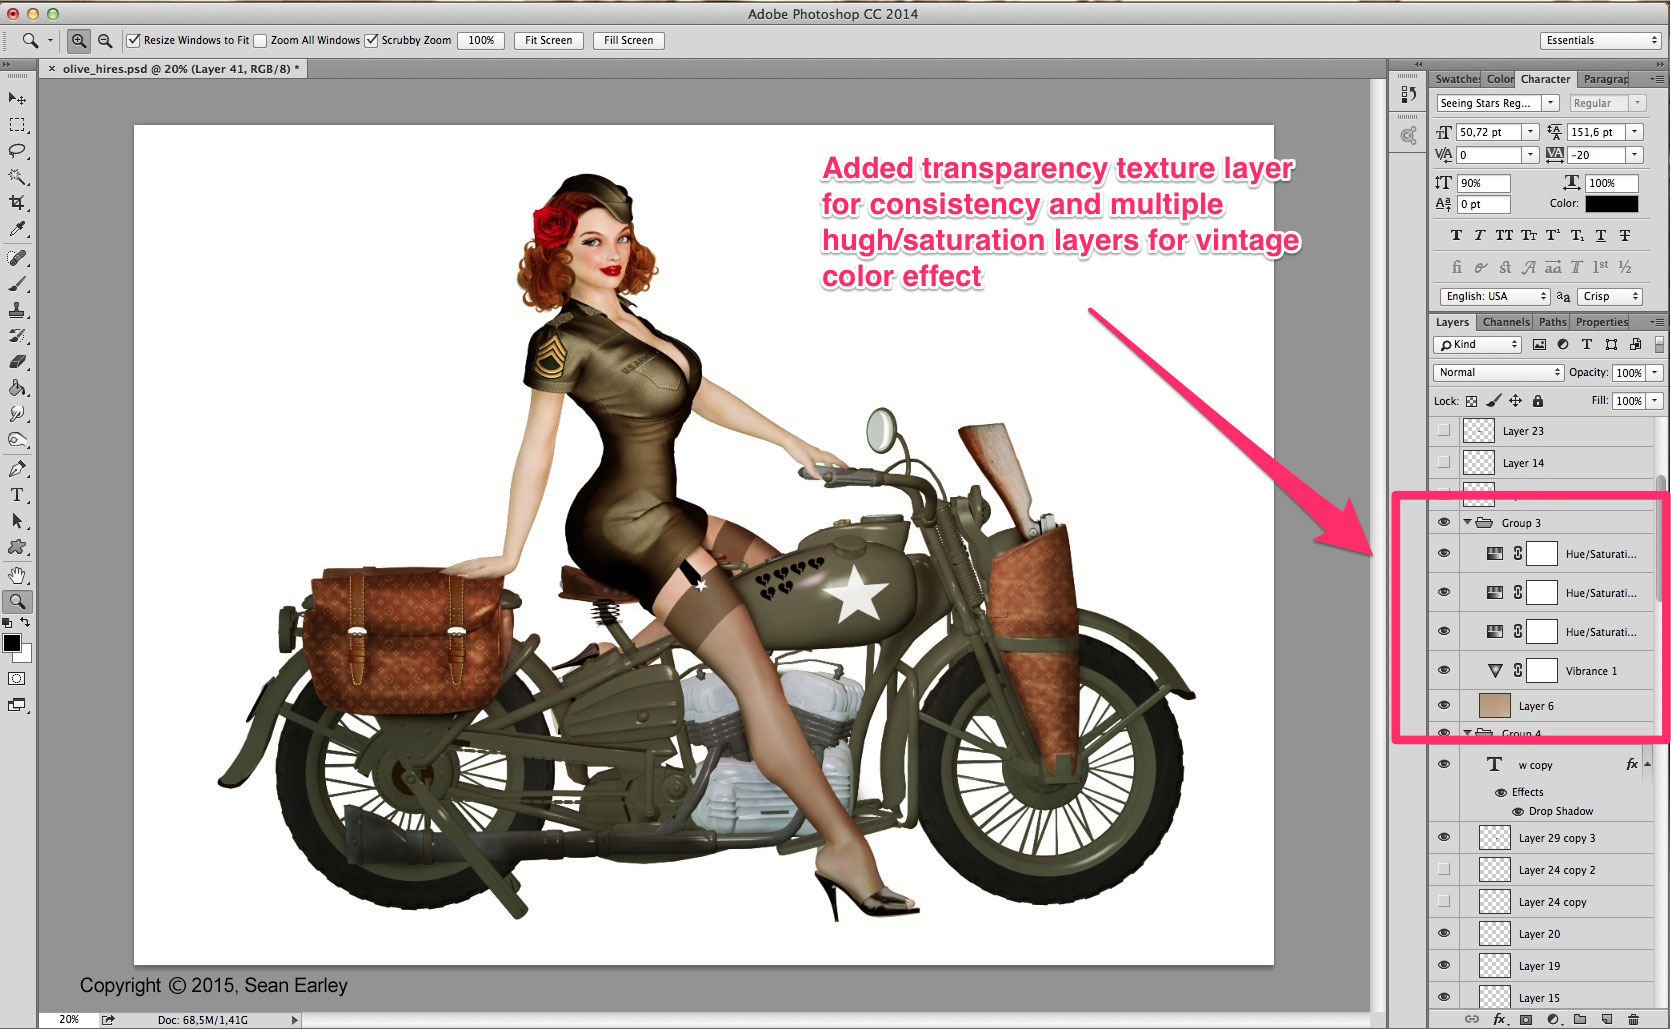
Step 4 – Vintage Coloring
After all the details were finished, I added an extra set of layers over the top of everything to give the piece a nice vintage color effect. I start by taking a texture layer such as a piece of wood, canvas or paper, (in this case wood) setting the layer to overlay, then adjusting the transparency setting until I liked the effect. This helps to add consistency to all the additional pieces I added that werent part of the original render.
I then experimented with a few different layers of various hue/saturation and vibrance using the same process as the texture layer, erasing some areas in places, in order to bring out more highlights and increase the vintage color effect.
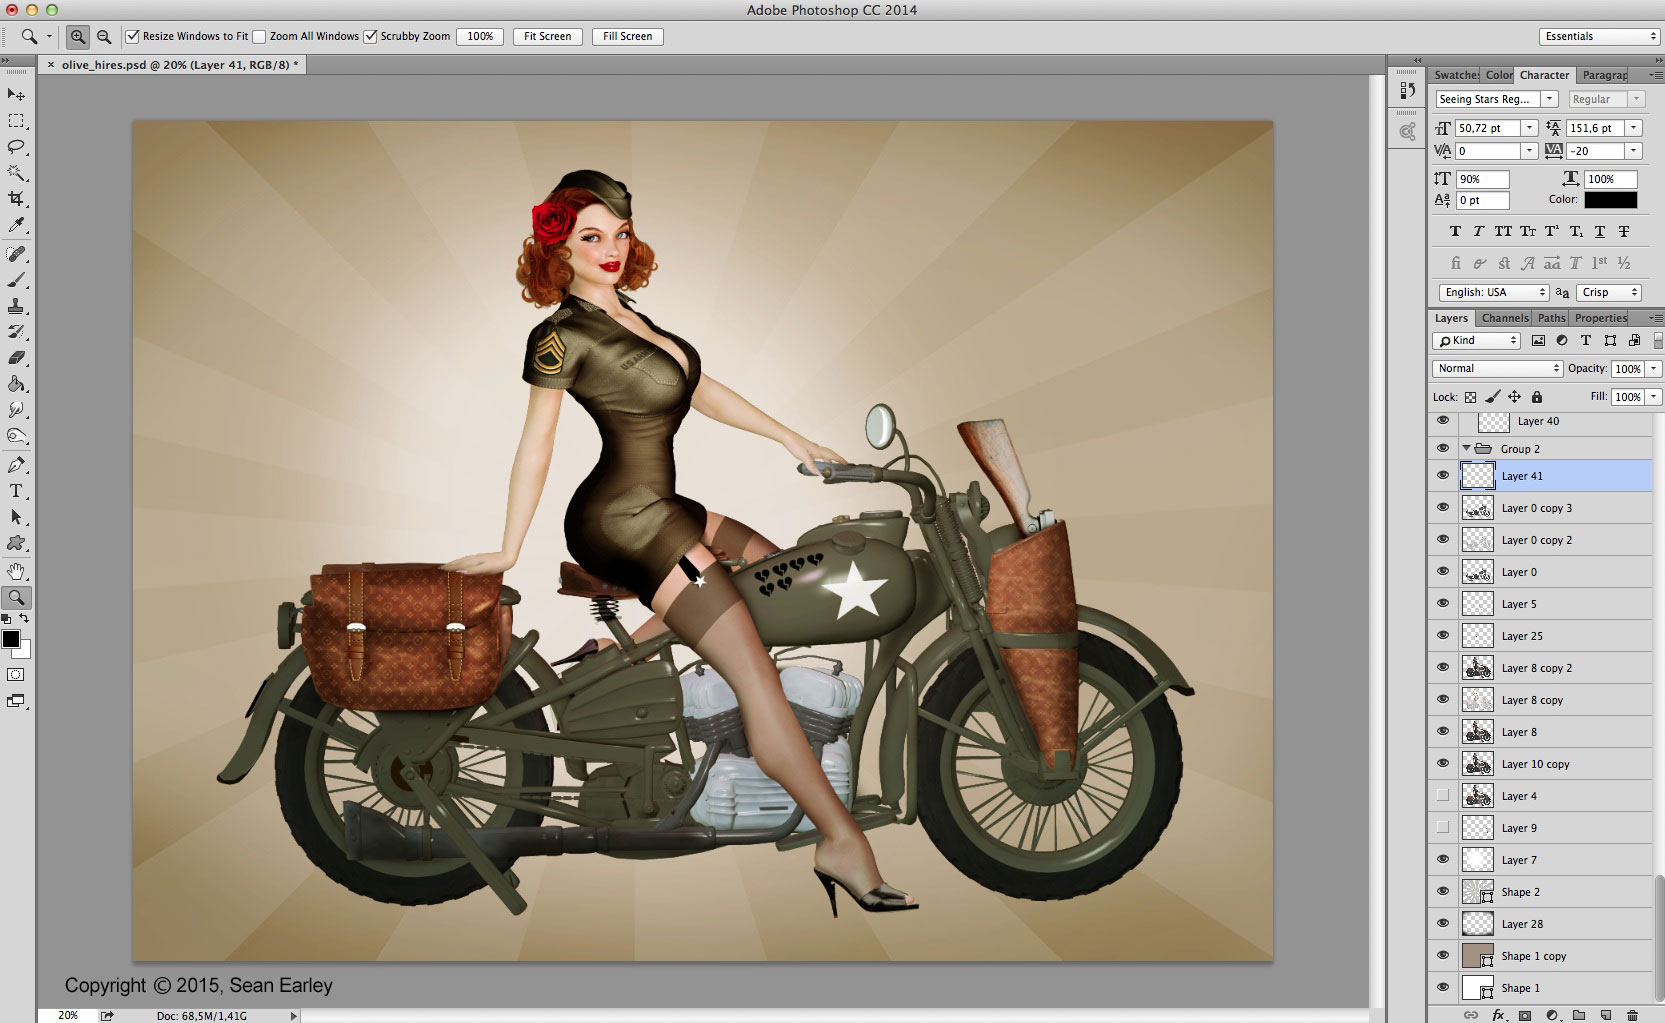
Step 5 – Background
Once that was done and I was happy with the color, I added a darker background and the sunburst effect to finish the piece off.
Interested In Learning More?
I hope you enjoyed this tutorial and maybe learned a few things. If you are interested in learning much more about how I design my pin-ups, I am in the process of creating a new, update online course to replace my old one “How to Create Amazing 3D Pin-Up Art” so be sure to join my mailing list and follow me on social media via the links in my sidebar to stay updated.

